How to make a magnetic Othello wall board
- David Beck

- Feb 6, 2021
- 3 min read
The Danish firm Naga.dk manufacture some really nice glass boards designed to act as an alternative to a home or office white board. They come in a range of colours and have the added benefit that they are also magnetic. I can't recall how I stumbled onto them but I immediately realised this was what I had been looking for for some time to achieve a wall mounted Othello board (my other aim is to have a giant set for the garden for when the kids are a little older, watch this space 👌).
To be upfront this board is going to set you back around £100 to achieve. Not least because the Naga boards are in the region of £30-40 and you will need 64 'super strong' magnets to have a complete Othello set you can play an entire game on.

That cost also doesn't include and assumes that you own a spare 'tournament style' board that you don't mind cannibalising for this purpose! The only way to get one in the UK is to import from Japan or earn a set by attending your first World Championship. So it is a little out of reach for most 🤷♂️. However you can get imported Japanese boards on Amazon which are similar but I believe will have ever so slightly smaller playing pieces.
To begin I ran masking tape along two edges and marked out where the (lets say these are the vertical) gridlines were to be. The squares on a tournament Othello board are roughly 4.5cm x 4.5cm. This turns out to be perfect as the board is 45cm x 45cm. Othello is on a 8x8 board, plus a border round the edge equals a perfect ten 4.5cm columns!


With a mark on both strips of masking tape every 4.5cm, using 'Self-Adhesive Gridding Tape and a straight edge I added the vertical grid lines. You can just about make out that I added a second mark 0.65cm from each 'primary' mark. This turned out not to be necessary once I was confident using the gridding tape mechanism. It was essentially to allow me to line up the straight edge at the optimum distance from each mark to allow the centre of the gridding tape mechanism to line up perfectly with each 'primary' mark.


Once all vertical marks were complete I was able to gently score along the edge of the masking tape so that I could peel the masking tape from the board with the excess gridding tape. It was then simply a case of repeating the process for the horizontal grind lines.

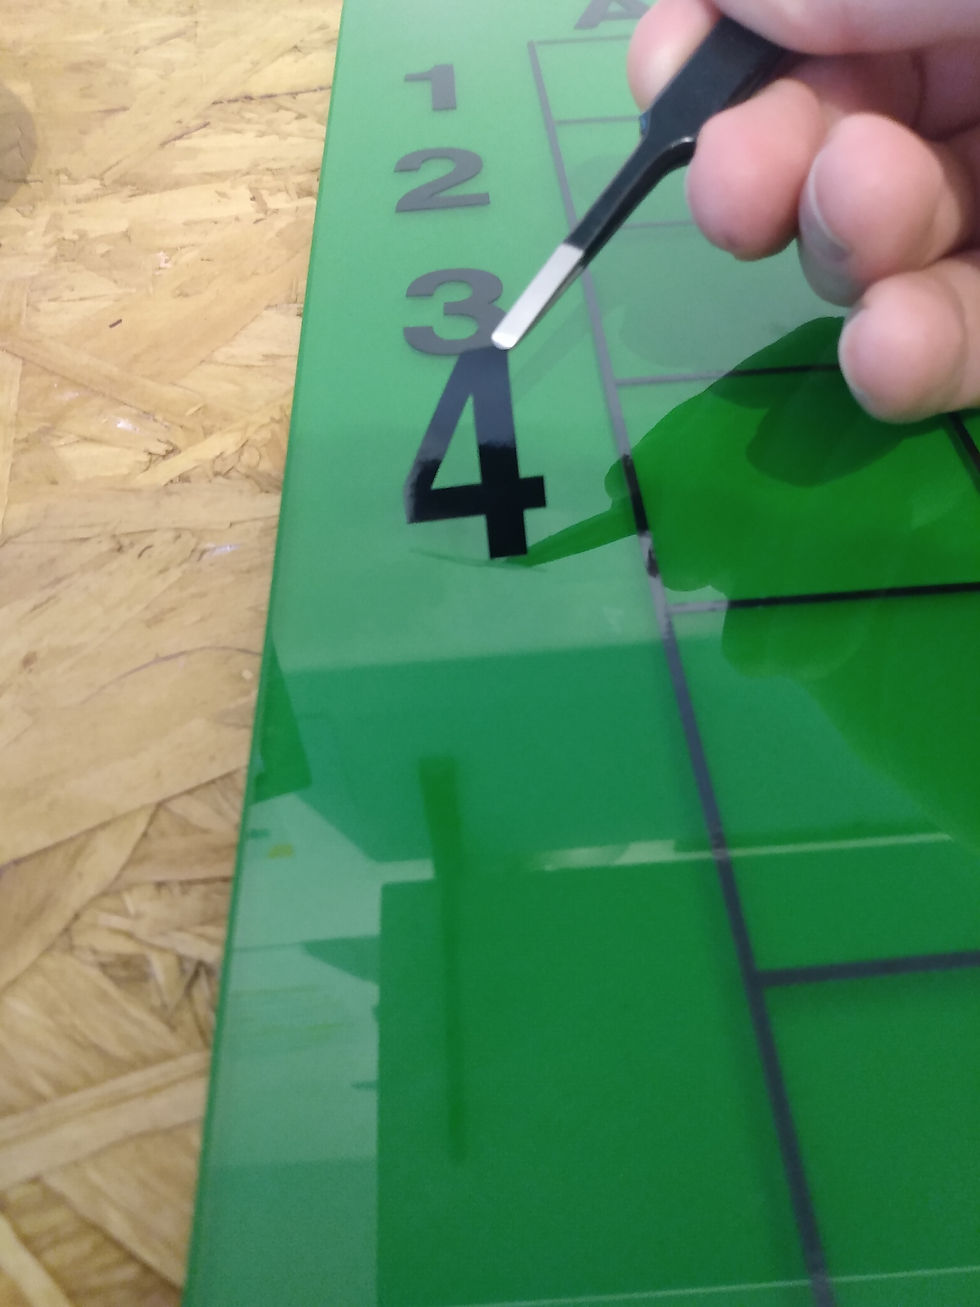
Because when I applied the first strips of masking tape I wasn't considering that I needed to be precise I ended up with a few gridlines that didn't quite meet where they should. Rather than starting all over (as I was at the end of the reel of gridding tape) I simply touched these points up with a permanent marker. I also purchased some adhesive number and letter stickers to run along the border of the board as grid references.
Earlier I mentioned requiring super strong magnets. I originally purchased some slightly weaker magnets which resulted in pieces sliding down the board and also because they are quite slim would rattle in the Othello pieces. The magnets I eventually settled on turn out to be a perfect fit that when the two halves of the Othello piece (which are easy to prise apart) are snapped back together the magnet is wedged in the piece and doesn't rattle. However being £8.99 for 12, meant to I had to purchase £54 worth of magnets! 😂
The result
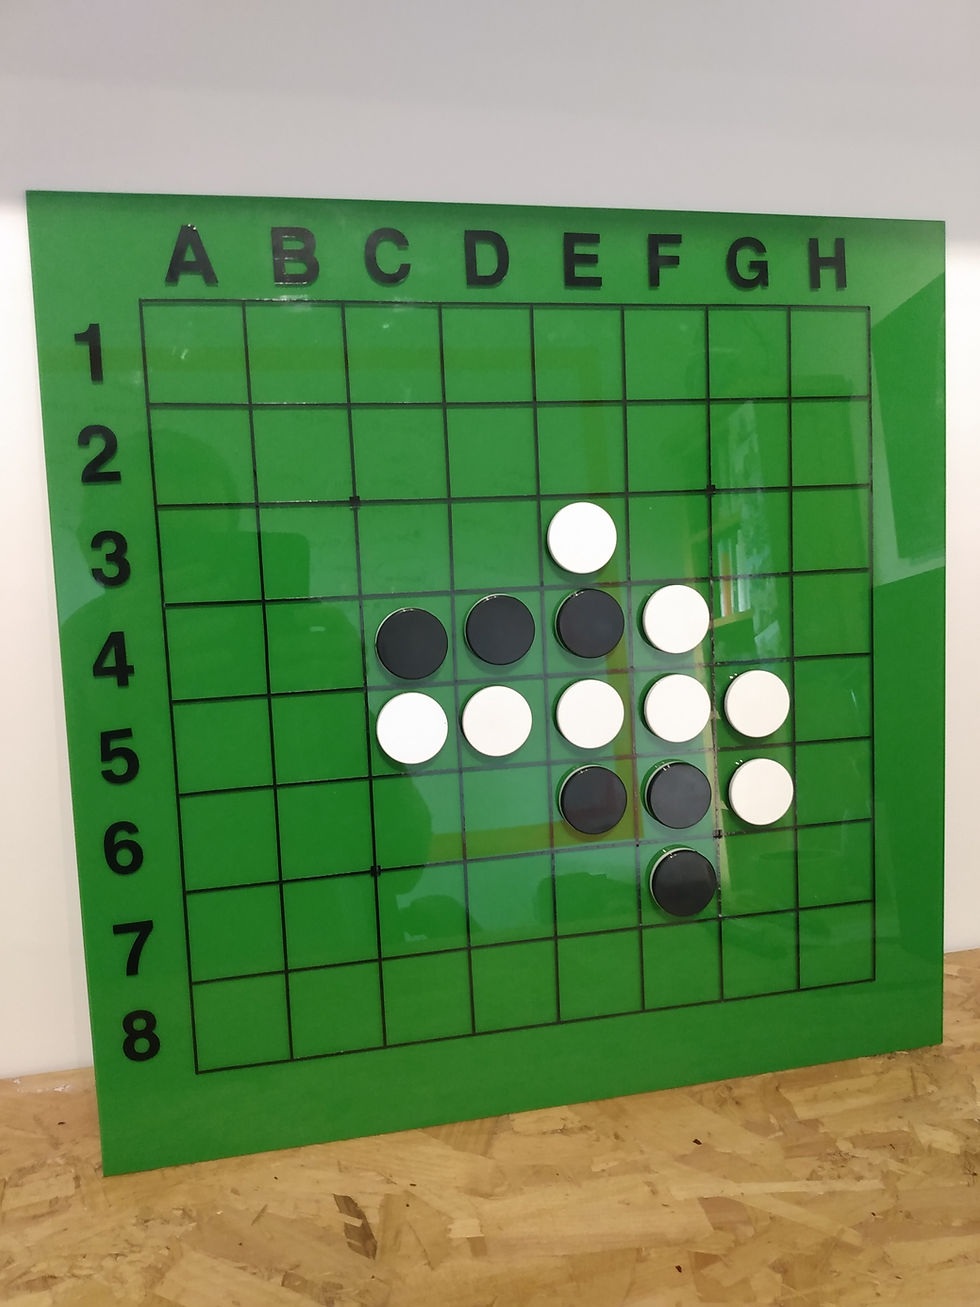
I am very pleased with the finished product and have been using it to break up the work day while working remotely from home, taking a moment to look at something other than a computer monitor!

Comments